While Elementor’s core and pro widgets cover many needs, real estate projects often demand bespoke functionality or unique designs – for example, a custom property carousel, a tailored mortgage calculator, or a specialized search filter.
Developers can create custom Elementor widgets (blocks) or use advanced plugins to meet these requirements. Here is an outline of development approaches, best practices, and useful add-ons for building custom real estate components in Elementor:
Building Custom Widgets via the Elementor API
For complete control, developers can code their own Elementor widgets as a mini plugin or part of a theme. Elementor provides a developer API that allows registering new widget classes (extending Elementor’s Widget base class) with custom controls (input fields in the editor) and custom render output.
For instance, a developer could create a “Property Card” widget that automatically pulls in a property’s image, price, and excerpt – with options in the editor to choose which property or how many to show.
The process involves setting up a WordPress plugin with proper structure, queueing scripts if needed, and using Elementor’s hooks to register the widget. Best practices here include following Elementor’s coding standards (e.g., prefixing your widget class and functions to avoid conflicts) and keeping the widget flexible (utilizing dynamic data options so the widget can bind to any property post).
By leveraging the official Elementor Developer Documentation and examples, developers can add virtually any new block type to Elementor. This approach is robust but requires PHP/JS coding skills. It’s ideal if the project involves something custom that no existing plugin offers.
Using Dynamic Content with Custom Post Types
A lot of “custom block” needs in real estate can be achieved without writing a widget from scratch using WordPress custom post types and custom fields combined with Elementor’s Dynamic Tags (a Pro feature). For example, instead of coding a special widget for property details, you can create a “Property” custom post type (using a plugin like CPT UI) and define fields like price, bedrooms, etc., with Advanced Custom Fields (ACF). Elementor Pro can then dynamically inject those fields into templates or a Generic Text widget.
In practice, you might design a single-property template in Elementor. For each piece of information (price, address, etc.), you click the dynamic content button and select the corresponding ACF field. This way, custom-structured data is displayed via regular Elementor widgets.
Best Practices for Custom Real Estate Blocks
Whether coding from scratch or assembling via plugins keep these practices in mind:
- Modularity: Encapsulate your custom functionality so it’s reusable. If coding a widget, make it flexible enough for use in different contexts (e.g., a Property Card widget can be used on a listings page or the homepage for featured properties by simply changing a query setting).
- Performance: Real estate sites can grow large (hundreds of listings, many images). Ensure custom queries are optimized (use Elementor’s query controls or WP_Query with caching as needed) and avoid loading heavy scripts on pages where they aren’t used. Elementor lets you conditionally load widgets (it won’t load widget code if not present on the page), so lean on that by not globally enqueueing scripts/styles unless necessary.
- Consistency: Use global design settings or inherit Elementor’s global colors and fonts in your custom widgets so that they blend with the rest of the site design. For example, if you create a custom “Featured Listing” widget, have it use the theme’s button styles for the “View Property” link instead of hardcoding a new style.
- Test Responsive Behavior: After building custom blocks, verify they display well on mobile and tablet breakpoints (Elementor’s editor allows switching views). Adjust CSS as needed to maintain a responsive layout.
- Documentation and Maintenance: If handing off to a client, document how to use any custom widget or custom field setup. For instance, if you used ACF for specific fields that populate Elementor templates, ensure the client can fill those out for each new listing. Also, keep custom code updated with Elementor updates – occasionally, Elementor introduces changes that might require tweaks to custom widgets (following their changelogs is wise).
By following these approaches, developers can extend Elementor to handle advanced real estate functions. In many cases, mixing these strategies yields the best result – e.g., use a third-party plugin for the heavy lifting of listings and search, then add a bit of custom code to fine-tune the output or integrate an external service (like a CRM API for leads). Elementor’s rich ecosystem means you rarely have to start from scratch; instead, you can focus on customizing the last mile to deliver a unique and high-performing real estate website.
Advantages and Disadvantages of Using Elementor for Real Estate Sites
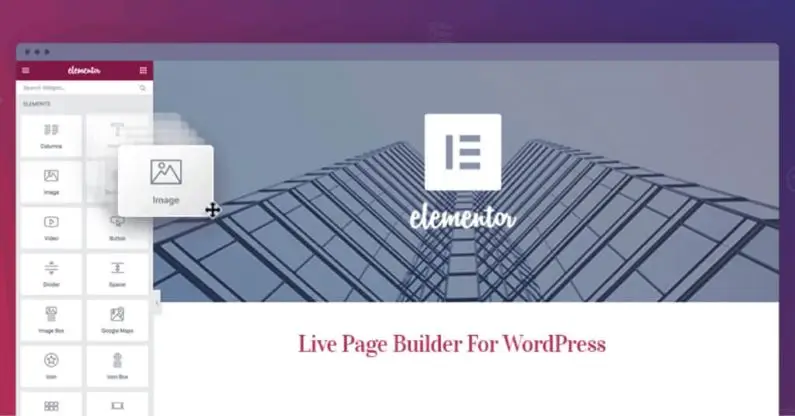

Like any tool, Elementor has its pros and cons. It’s important to weigh them, especially in real estate websites where both ease of content management and site performance are critical. Here are the key advantages and disadvantages:
Advantages
Ease of Use – Fast Design without Coding
Elementor’s intuitive visual editor makes it easy for non-developers to build and update pages. Real estate agents or content editors can tweak layouts, add new sections, or rearrange listings via drag-and-drop. It reduces reliance on developers for routine changes. The real-time preview helps users see exactly what their page will look like, which is great for quickly iterating on a homepage or landing page design. Creating a professional real estate site is much faster than traditional coding – you can import a template, replace content, and launch.
Rich Features and Widgets
Elementor is loaded with widgets (image galleries, sliders, forms, tabs, etc.) and supports many add-ons, giving you a comprehensive toolbox. For a real estate site, you have elements for nearly everything – testimonial sliders for client quotes, icon boxes for key property features, progress bars for stats, etc., without extra plugins. It also includes popup building, animations, and a Theme Builder (in Pro) to create custom headers/footers and post templates.
Dynamic Content Capabilities:
With Elementor Pro, you can easily integrate dynamic data (from custom fields, blog posts, WooCommerce products, etc.) into designs. This is highly beneficial for real estate because property listings are custom content. Designing one template and applying it to dozens of listings with different data is a huge time-saver and ensures consistency.
You can create archive templates for property categories (e.g., rentals vs. sales) and use conditional display. Competing builders like Divi have some dynamic features, but many experts find Elementor’s implementation more robust for complex sites. Essentially, Elementor hits a sweet spot where beginners can ignore dynamic stuff and use static content, while advanced users can tap into dynamic listing design when needed.
Large Community and Ecosystem:
Elementor has a massive user base and developer community. For end-users, this means lots of tutorials, documentation, and community support if you get stuck.
For developers, it means a wealth of third-party add-ons and solutions to pick from (many listed earlier). If you need a niche feature (say, a mortgage calculator widget or an IDX integration), chances are someone has built an add-on for Elementor to do it.
This ecosystem de-risks using Elementor for a critical business site like real estate – you’re not locked into a proprietary platform with limited support. The community also produces shared templates/kits, so you might find a free page design for “Property Showcase” or “Agent Profile” that you can import and adapt.
In contrast, a builder like Bricks is newer and has a smaller community (so fewer pre-made real estate templates are available). Elementor’s thriving ecosystem is a significant advantage for getting practical, ready-made solutions.
Responsive and Multi-Device Editing
As noted, Elementor makes it straightforward to achieve responsive design. Beyond that, it offers device-specific customization—you can show/hide sections on mobile vs. desktop or even design separate sections optimized for mobile.
This level of control means a better user experience, which is key for real estate browsing. For example, you might use a wide-image, wide-image carousel on a desktop but switch to a stacked image gallery on mobile for easier scrolling. Elementor lets you do that using the same page design.
Integration with Marketing Tools
Capturing and managing leads on a real estate site often involves external tools (CRM systems, email marketing, chat widgets). Elementor plays nicely here – its forms can directly integrate with services like MailChimp, HubSpot, or Zapier for CRM forwarding.
And if not, you can embed code or use add-ons to connect to almost anything. The Popup Builder can create timely offers or capture leads (e.g., “Sign up to get new listings by email” lightbox). This level of integration support is a plus for boosting the site’s conversion rate. Real estate professionals can experiment with landing pages and lead forms without hiring a developer each time, thanks to Elementor’s built-in marketing widgets.
Disadvantages
Performance Overhead
One common criticism of Elementor is that it can produce heavier page code than hand-coded or lighter builder solutions. Each widget and style you add generates additional HTML, CSS, and sometimes JavaScript. This can impact load times on pages with many Elementor sections (for example, a long homepage with multiple carousels, accordions, etc.).
In real estate, where you might have image-heavy pages (property photos) and possibly many listings on one page, you need to be mindful of performance. Caching plugins, image optimization, and not overloading a single page with too many Elementor widgets are essential.
It’s worth noting that all page builders add some overhead – for example, Divi and WPBakery have similar or even larger file outputs in many cases. But compared to a lean, custom-coded theme, an Elementor site will usually be slower unless tuned.
This is not a deal-breaker for most small-to-medium sites, but you might need to invest more in performance optimization for huge property portals with thousands of listings.
Possible Bloat & Maintenance
Along with performance considerations, Elementor can lead to “bloat” if misused. It’s easy for an editor to keep adding widgets, inline styling, or multiple add-on plugins, which can make the site harder to maintain over time.
If too many third-party Elementor add-ons are installed, there’s potential for plugin conflicts or redundant functionality (and every extra plugin can slow things down or introduce bugs). Also, because Elementor stores page layouts in the database, the content isn’t as cleanly portable as a standard WordPress post.
If you disable Elementor one day, your pages won’t automatically look the same—you’d likely have to rebuild them (this is the lock-in effect common to all page builders). Switching away from Elementor requires significant redesign effort, as one user pointed out: once a site is built with it, reverting to native editing means starting over for the layout.
However, this is somewhat mitigated because you can continue using Elementor for the long term, and it’s widely supported. Just be aware that you’re committing to the Builder for that site’s lifecycle, and plan accordingly.
Learning Curve for Advanced Features
Elementor is very friendly to beginners for basic drag-and-drop. But there is a bit of a learning curve to truly harness features like dynamic templates, custom CSS in widgets, or motion effects. Real estate sites requiring advanced features (e.g.,, a complex search results template with conditions or fancy CSS hover effects on property cards) will need someone who invests time in learning Elementor deeply or has development knowledge.
It’s not as steep as learning to code a theme from scratch, but mastering some advanced Elementor techniques demands time and effort. Additionally, building a scalable site with Elementor requires some planning (for example, understanding how to use global templates, Theme Builder, etc., rather than individually designing 100 property pages – a novice might do the latter and end up with a maintenance headache).
So, while Elementor empowers non-coders, complex real estate projects still benefit from having a developer or power user involved to set up the structure properly.
Reliance on Pro for Key Functionality
While Elementor has a free version, many features that are particularly useful for real estate (dynamic content, forms, template builder, etc.) are only in Elementor Pro (paid). To fully utilize it, one must consider the Pro license cost. The cost is moderate for a single site, but agencies or developers building many sites might need higher-tier plans.
Competing builders have different models. Divi, for example, has a one-time lifetime fee option that can be more cost-effective long-term. The cost is usually justified by Elementor Pro’s functionality (and real estate businesses can see ROI from even one closed lead via a better website), but it’s a factor to note.
Additionally, some third-party add-ons themselves are paid. In summary, achieving the “complete” real estate solution (with IDX integration, etc.) might involve multiple premium plugins alongside Elementor, so budgeting for those is important.
WP Plugin Dependency and Updates
Elementor is a plugin that must coexist with your theme and other plugins. Occasionally, conflicts can arise. For instance, some users have faced issues when using specific older themes or when another plugin loads a script that confuses the Elementor editor.
Ensuring everything (WordPress core, Elementor, theme, PHP version) is up-to-date is necessary to avoid editor glitches or site errors. The Elementor team is active in updates, which is good, but it also means you should maintain a staging site or backup routine – an update could potentially break a custom widget or a style, so caution is needed in updating on a live site (this is true for WordPress in general, but worth noting).
The more complex your Elementor setup (especially with many customizations), the more you must follow maintenance best practices.
In evaluating Elementor for your real estate site, consider that its advantages often include quickly launching a feature-rich, attractive site, and its downsides revolve around performance and complexity management.
Many successful realtor sites use Elementor but do so with an eye on optimization. Next, let’s compare Elementor with some alternative page builders to see how it stacks up, especially for real estate purposes.
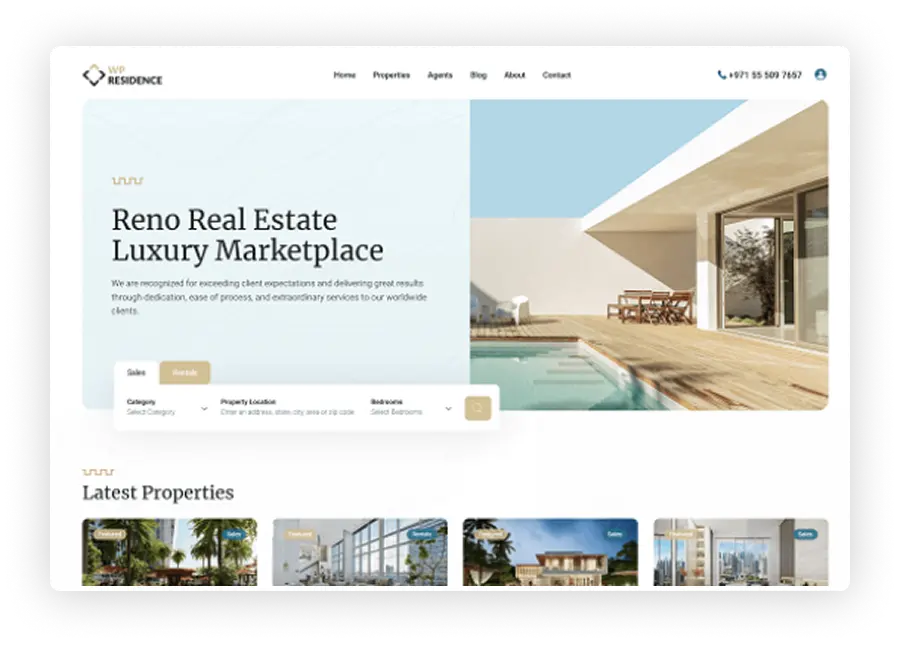
How WpResidence Is creating the custom real estate widgets
Here is a concise explanation of how a custom Elementor widget for displaying a Featured Property is typically structured in WPResidence, covering three main steps: creating the widget file, passing the property ID to the function, and gathering and displaying the property details. Rather than listing items, this walk-through presents each phase in narrative form. The code example provided is illustrative of common WPResidence and Elementor practices.

Creating the Widget File
In WPResidence, custom Elementor widgets are usually placed in a dedicated folder (for example, \plugins\residence-elementor\widgets\). You might see a file named something like featured-property.php
The file defines a PHP class that extends Elementor’s Widget_Base, ensuring it follows the required structure for any custom Elementor widget.
Inside this class, you first declare basic metadata—such as the widget name, title, and icon—for Elementor’s interface. Then, you configure the “controls” in Elementor’s sidebar, which realtors or site admins can use to customize the widget’s parameters. In this specific scenario, one of the most critical parameters is the Property ID, which tells WPResidence which “estate_property” post to display.
A minimal example of such a widget file might look like this:
<?php
namespace WPResidence\Elementor;

use Elementor\Widget_Base;
use Elementor\Controls_Manager;

if ( ! defined( 'ABSPATH' ) ) {
    exit; // Prevent direct access
}

class Elementor_Featured_Property_Widget extends Widget_Base {

    public function get_name() {
        return 'wpresidence_featured_property';
    }

    public function get_title() {
        return __( 'Featured Property (WPResidence)', 'wpresidence' );
    }

    public function get_icon() {
        return 'fa fa-home';
    }

    public function get_categories() {
        return [ 'wpresidence-widgets' ];
    }

    protected function register_controls() {
        // Property ID input
        $this->start_controls_section(
            'featured_prop_section',
            [
                'label' => __( 'Featured Property Settings', 'wpresidence' ),
                'tab'   => Controls_Manager::TAB_CONTENT,
            ]
        );

        $this->add_control(
            'property_id',
            [
                'label'       => __( 'Property ID', 'wpresidence' ),
                'type'        => Controls_Manager::TEXT,
                'description' => __( 'Enter the ID of the estate_property post.', 'wpresidence' ),
            ]
        );

        $this->end_controls_section();
    }

    protected function render() {
        $settings    = $this->get_settings_for_display();
        $featured_id = ! empty( $settings['property_id'] ) ? absint( $settings['property_id'] ) : 0;

        // Call WPResidence's function or a shortcode that references it
        echo do_shortcode( '[featured_property id="' . $featured_id . '"]' );
    }
}
In this example, the widget class file sets up a text field (Property ID) that site admins can adjust. The critical part is passing that ID to the [featured_property] shortcode, which is called the WPResidence function, to generate the final HTML.
Passing the Property ID to the Function
Inside the render() method, you extract the user-provided “property_id” value from the Elementor controls ($settings[‘property_id’]). Once you have that integer, embed it into the [featured_property] shortcode. WPResidence parses this shortcode through its shortcode handler, which calls wpestate_featured_property() under the hood. That function then takes the numeric ID, verifies that the post is a valid and published “estate_property,” and pulls the relevant data from the database.
Tying the widget’s Property ID field directly to the shortcode attribute gives realtors (or whoever is editing the page) a no-code way to change which property is featured. They enter a different ID in the Elementor panel, and the front end updates automatically.
Gathering and Displaying the Property Details
On the WPResidence side, the wpestate_featured_property() function (often found in one of the theme’s core files) checks if the post is valid, then loads a specialized PHP template—such as featured_property_1.php or featured_property_2.php—depending on additional parameters like “design_type.”
That template might contain HTML for a card layout, a slider, or other specialized design the theme offers.
During this step, the function fetches details such as the property’s title, thumbnail images, custom fields (like number of bedrooms or bathrooms), and optional “sale line” text (for instance, “For Sale” or “Just Listed”). It uses WordPress’s standard functions—like get_the_title() or get_post_meta()—to retrieve the content and then outputs it in a structured format.
WPResidence often employs transient caching to store the rendered HTML, which helps maintain performance on high-traffic real estate websites.
Once the function finishes assembling this HTML, it returns the completed markup for display on the front end. Because Elementor executes the shortcode at runtime, the final result appears wherever the custom widget is placed—most commonly on a homepage, a listings page, or even a dedicated property spotlight section.
In short, you build a custom Elementor widget file (with a class extending Widget_Base) to collect input from the user, such as the Property ID. You then pass that ID to the [featured_property] shortcode or directly to the WPResidence function. WPResidence uses the property ID to validate the post, retrieve its data, and generate a styled HTML output (via template files). This process cleanly separates the Elementor interface (where the realtor or site owner configures which property to feature) from the data-fetching and layout logic (which WPResidence handles in its theme files).
















+ There are no comments
Add yours